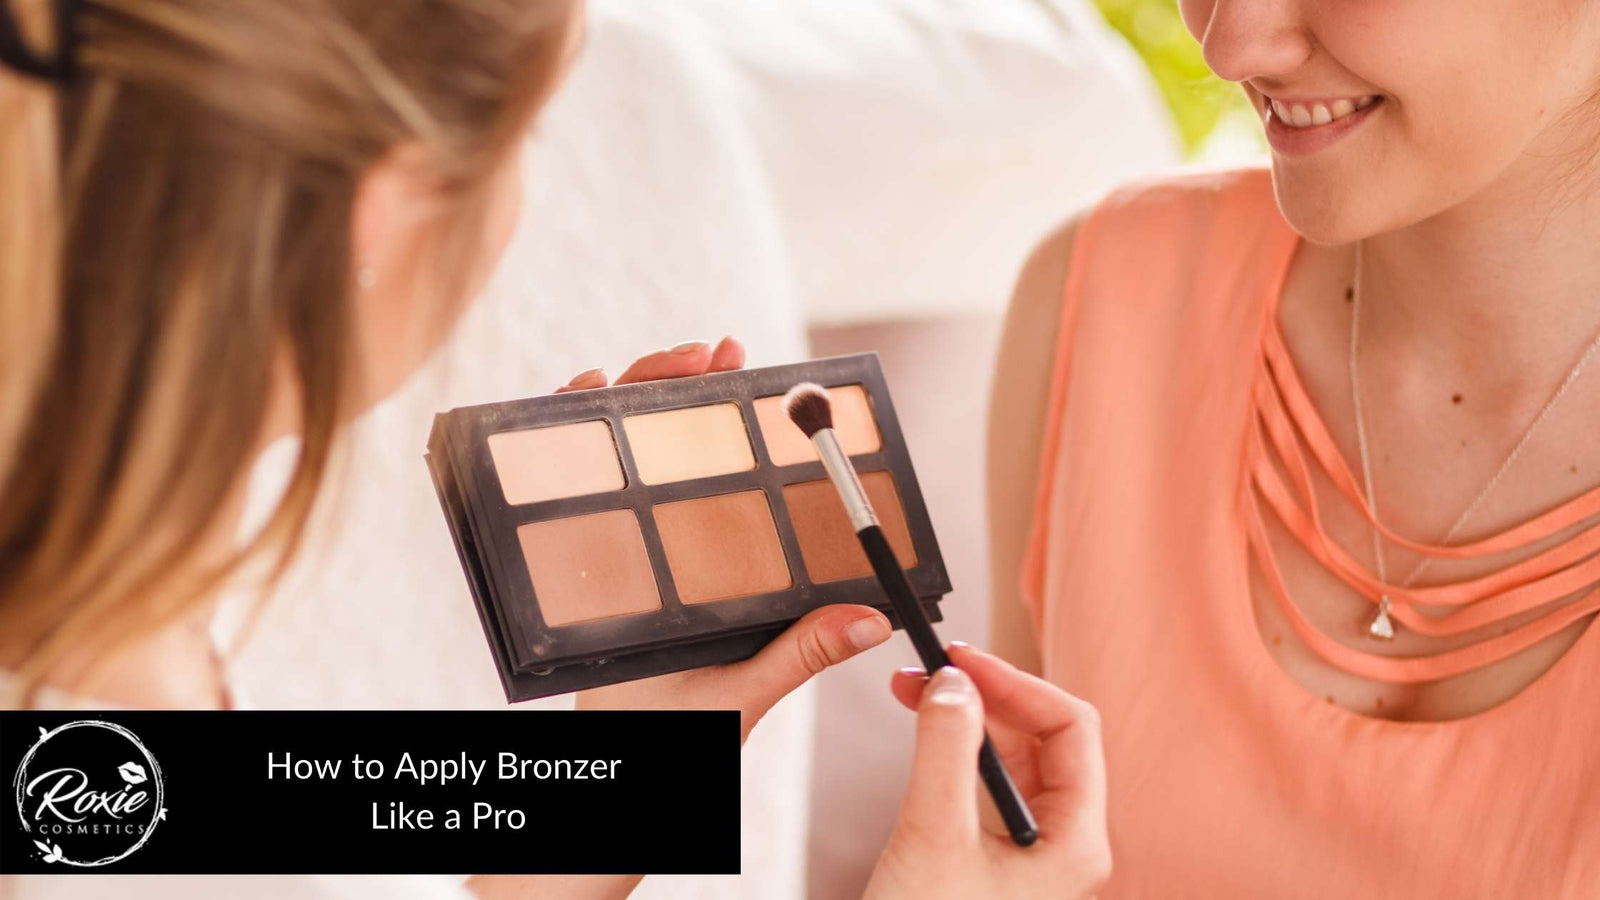
Bronzer is a makeup product that adds warmth, sun-tanned, and colour to the skin without going out in the sun. It gives a fake tan and shines on specific skin parts, such as the hairline, cheekbones, jawline, nose, chin, and neck. Bronzer defines the face and can hide the flaws like blemishes. It can be applied to the body to provide an illusion. Using the perfect bronzer is vital to give a natural look. When selecting a bronzer, the skin tone, type, and undertone should be considered. Choosing the wrong shade of bronzer is one of the common mistakes. The bronzer should be one or two shades darker than the natural skin tone. It has four common forms: powder, gel, cream, and liquid. The powder is the most versatile form of bronzer and is recommended for oily skin. For a natural look, use the cream and gel form. The liquid is suitable for dry and flaky skin. Bronzers are usually matte or shimmery. The common mistakes in applying bronzers are putting it all over the face, incorrect shade for skin tone, overdoing shimmer, and using powder bronzer or bronzer alone.
Bronzer is typically applied after foundation and concealer. It can be applied on a bare face if the skin is even and acne-free. If the skin is dry, a liquid bronzer can be used before foundation but with a well-moisturised look. Bronzers and contours have similarities, but they are different in benefits. The contour can give an illusion of a shadow that makes the look more shaped and adds dimension to the face, while the bronzers provide warmth to the skin. Bronzers can be used as a contour as long as it is preferred and matches the skin tone. Blending the products on the face properly is the secret to a perfect result.
Listed below are the steps on how to apply bronzer like a pro.
- Prep your skin for flawless application.
- Pick your bronzer shade.
- Choose Your Bronze Formula
- When in doubt, apply in a 3-formation.
1. Prep your skin for flawless application.

Applying makeup is not only about how it is ideally used but also how the skin is prepped correctly. Preparing the skin and keeping it clean before putting on makeup is essential. There are three steps to prepare the skin for flawless and seamless application of bronzer. Cleansing the face is the primary step in creating nourished and flexible skin. Remove all dirt, oil, and dead skin cells by gently exfoliating the face. Exfoliating lessens the appearance of the pores and makes the skin smooth-looking. After cleansing and exfoliating, apply serum, toner, and moisturiser to make the skin hydrated and protected against damage from the sun and other pollutants. Let the products sit and penetrate the skin for one to two minutes before applying primer. Primer is designed to make a soft and smooth base for blending makeup on the face. Pores infused with primer result in a smooth and glowing complexion and prevent the makeup from sliding off the face. Lastly, apply foundation and concealer. Bronzer goes after applying foundation, concealer, or face powder but before the blush.
2. Pick your bronzer shade.

The best bronzer shade is the one that is well-matched to the skin tone. The right bronzer shade must be two shades darker than the natural skin tone and with a matching undertone. There are three types of skin tone: fair, medium, and dark. Light complexion should use a light, fine, and glitter-free bronzer. Daring bronze with a shimmery effect is the best shade for those with medium to dark complexions. Determining the undertone can be sometimes confusing. There are three categories of undertone: warm, cool, and neutral. The warm undertone has golden, peachy, or yellow tones, while the cool undertone has bluish, red, or pink tones. A neutral undertone is a combination of warm and cool. The technique to determine the undertone is identifying the colour of the veins on the wrist. If the veins are greenish, the undertone is warm. The veins will appear bluish or purple for those with a cool undertone. With a neutral undertone, the veins look colourless or the same as the colour of the skin.
3. Choose Your Bronze Formula

Bronzers have four common types: powder, gel, cream, and liquid. Powder bronzer is the most flexible because it is suitable for all skin types, especially with oily and combination skin. As mentioned on How to Choose A Bronzer Shade & Formula, those with dry skin can go for a shimmery-finished bronzer, while those with oily skin can use a matte-finished bronzer. Normal skin types can use either matte-finished or shimmery-finished bronzer. The powder bronzer is easy and quick to use. Sweep the powder bronzer across the forehead, bridge of the nose, and cheeks using a powder brush. The powder brush must be medium size, soft, and firm. Gel or Cream Bronzer is ideal for dry and normal skin because it won’t settle on the dry patches or flakes on the face. A makeup sponge or synthetic hair foundation brush is recommended when applying gel or cream bronzer. Suppose the bronzer is a stick type, fingertips or a makeup sponge can be used to apply and spread the bronzer on the face. A liquid bronzer is suitable for dry skin or those who want a glistening and glossy makeup finish. It offers a sun-tanned glow look on the face. A soft brush or kabuki brush can be used in applying a liquid bronzer. Apply a liquid foundation on the apples of the cheeks, temples, and nose’s bridge, and blend in a circular motion.
Powder Bronzer

Gel Bronzer

Cream Bronzer

Liquid Bronzer

Bronzer Stick

4. When in doubt, apply in a 3-formation.

Bronzer is applied to the areas where the sun is naturally hit. There is a tried and tested technique to pull off the look using bronzer. It is called the 3-formation. Create a 3-shape on the face using bronzer and the brush. Focus on the hairline, making a circular motion. Blend the bronzer downward to have a look of a natural tan. The more the bronzer is pulled down, the smaller the area will look. After applying to the hairline, slide the bronzer down the cheeks' slope and the jawline. Bronzer should be in a 3-shape on the side of the face. Apply a bronzer across the nose’s side and bridge for an additional sun-tanned look. It is crucial to assess the shape of the face before putting the bronzer on. How the bronzer is applied depends on the shape of the face. A heart-shaped face has a broad forehead and narrow chin. If the length of the face is equal to the width, the shape of the face is square. An oval-shaped face has a longer length than the width of the face, and the jawline is round. The rectangle-shaped face is similar to the square-shaped face. The only difference is the length of the face is longer than the width. The cheekbones are the widest part of the round-shaped face, while the chin and forehead are narrow.
3-Formation

What are the ways to choose the right Bronzer for skin tone?
Bronzers can go wrong if the shade doesn’t compliment the skin tone. Choosing one or two shades darker than the natural tone is advisable. There are three skin tones: Fair, Light to Medium, and Dark. Bronzer with light hues of rose, pink, and beige taupe is suitable for those with fair skin. Fair skin often reacts and turns pink when the sun hits the skin. To pull off a natural-looking sun-tanned face, go for the lighter bronze if one desires a shimmery finish, pink and silver shade instead of gold. Any shades are suitable for light to medium skin tone, but the multi-layered bronzer is not advisable. Copper and earthy tones complement the natural tan, and avoid the orange and red tones. Warmer hues such as terracotta or chocolate tones with warm or blue undertones are perfect for those with darker skin tones. For a shimmer effect on the face, look for gold flecks to illuminate.
What are the common mistakes of applying Bronzer?
Bronzer can be too much if it is not done perfectly and flawlessly. It can be too glittery, too orange, or too streaky. Based on the Most Common Bronzer Mistakes, flaws can be avoidable, and applying bronzer can be easy if adequately mastered.
Listed below are the common mistakes of applying bronzers.
What is the difference between contour and bronzer?
Bronzers and contours have similarities, but they are different in how they are used, as mentioned in the What Is the Difference Between Contour and Bronzer?. It is confusing because they must be two shades darker than the skin tone. They have the same formulations and are applied to the same areas using a brush after foundation and concealer. Contour is used to create a shadow on the face that can give a shaped look and depth to the face. It is used on a specific face area to provide a sculpted look and illusion of an extra-defined face. To apply contour, map out the areas desired to have a shadow. Powder, liquid, and cream are the different forms of contour, and usually, it has a matte finish, while bronzers can be matte, but they are always shimmery and dewy, which can give a glowy look to the skin. Bronzers provide warmth to the face where the sun would naturally hit. Its goal is to provide a sun-tanned look.
Is bronzer used before or after foundation?
Bronzer is usually applied after the foundation but before blush. It is used after putting foundation, concealer, and powder on the face. Foundation creates an even appearance that makes the bronzer blend effortlessly. Bronzer can be applied without any foundation if the skin is even and free from discolouration and acne, but it can be challenging to blend. Bronzer can be used on a bare face. It gives a natural and sun-tanned glow but ensures that the face is well-hydrated for easy application and a long-lasting look. Liquid bronzers can be used after moisturiser and before foundation. It is best for those with dry skin. Apply liquid bronzer after using moisturiser. A liquid bronzer is easy to blend on moist skin. Applying a liquid bronzer on dehydrated skin is one of the mistakes because it is hard to blend and can create an uneven colour.
Is it okay to use bronzer as contour?
Yes, bronzer can be used as a contour, adding warmth while shaping and defining the face. It should be done correctly to pull off a natural look. Bronzers are usually warm-toned to have a sun-tanned glow effect with a matte or shimmery finish, while contours are cool-toned to create a shadow and more defined look. The skin tone should be considered when using bronzer as a contour. Those with a fair and light complexion with a cool undertone can use bronzer as a contour. As well as those with medium and dark complexion with a warm undertone, it should be applied lighter because products such as blush, bronzers, and contour should be opposite of the skin tone. The important thing is to blend the products on the face properly.

